Who doesn't like getting free stuff??? I know I do. Craft Passion, one of my favorite crafting sites, is sponsoring another give-away.
Click here to get more information.
Good Luck!!

Monday, July 30, 2012
Tuesday, June 19, 2012
GADGET GIRL PURSE

I tried out a new purse pattern (see above) that I found really easy. Whenever I try a new pattern, I like to follow the directions the first time, just to see what the original should look like. After the first run, I make changes I think will suit me better.
Here is my version of the pattern with fabric I bought on www.connectingthreads.com

I really liked all the pockets created on the inside of the purse. It gave me lots of storage for little things like my cell-phone and keys. (see pics below) I hate digging in my purse for those things.


I am really happy with the finished product and get lots of compliments on the purse.
The only change I would make the next time is to use less fleece. I would not use fleece to line the top of the purse because it makes it too bulky when you fold it.
Look for another post with another version and changes.
Saturday, June 2, 2012
Kitchen Remodel... a four letter word
We recently finished our kitchen remodel -- Hallelujah!!! It took about 8 weeks to be completely done, longer than I planned. But I learned that things don't always go as I plan - go figure. I had it all planned out - cabinets would be installed around April 16 - wrong! I spent several weeks walking on concrete and plywood floors with dust everywhere and my allergies in full bloom. Our "kitchen sink" was the downstairs bathroom. We BBQ-ed when we could; ate out often, but that got old. Thankfully, Fresh and Easy was down the street and they have delicious freshly-made meals that you can pop in a microwave.
Everyone who has ever done a remodel goes through the same thing. I kept reminding myself that this is only temporary and I would have the rest of my life to enjoy my new kitchen.
The remodel turned out GREAT! I still walk into my kitchen and do a double-take; I can't believe this is my kitchen. I want to share the pictures, because I am so happy with the way things turned out. I used to hate my cracker-box-of-a-kitchen, but now I feel as if I have the biggest kitchen ever.
I have before and after pictures, so you can see the whole story.

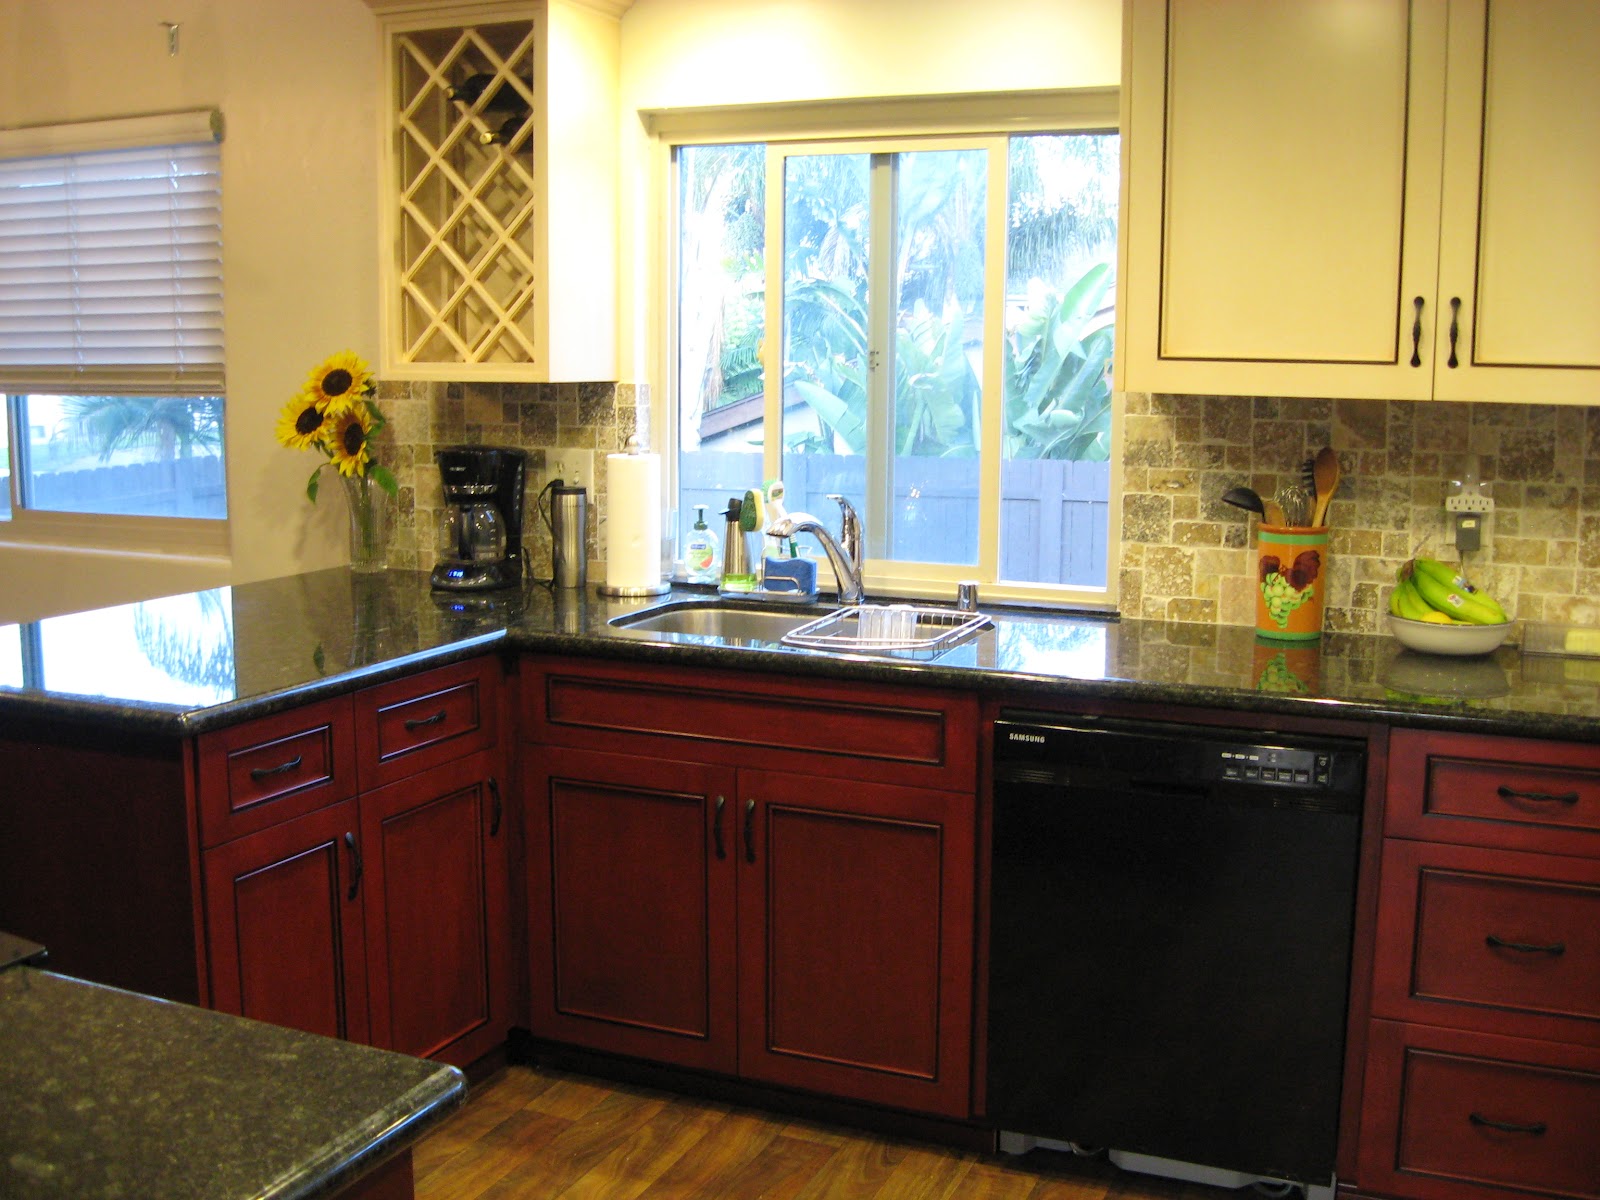
 The new-and-improved kitchen sink.
 The view looking toward the dining room.
 The same view, now looking into the living room. We knocked out the wall.
 The stove area.
 The stove area after. We knocked out another wall. We had to add a support post to hold up the ceiling.

 The pantry - after.
 Pull-out drawers in the pantry -- YAY!! Love these.
 Here is a kitchen cart I bought years ago to add more "counter space". This area was actually designed as an "eat-in" kitchen. This was a total waste of space.


 Now the wall is cabinets, cabinets, cabinets - and they are nice and deep. It created lots of storage space.
 Another view of the same wall.
 View from the entry looking toward the kitchen. Behind that wall/bookshelves is the stove and hood.
 Same view, but no more wall. We added a bar and stools for more seating. Now we can have conversations with guests while we work in the kitchen. Before, everyone just crowded into the small kitchen and got in the way.
 View from the living room looking toward the kitchen.
 Same view from the living room now opened up, making everything look so much larger.
 View standing in the dining room and looking toward the kitchen sink area.
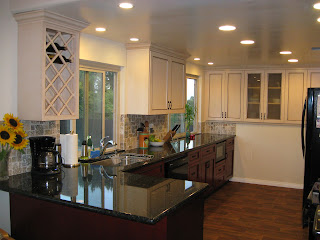 Same view as above, now opened up without the wall. The wine rack in the upper left-hand corner is now filled! :-)

 Same view, now you can see all the way through to the stairs.
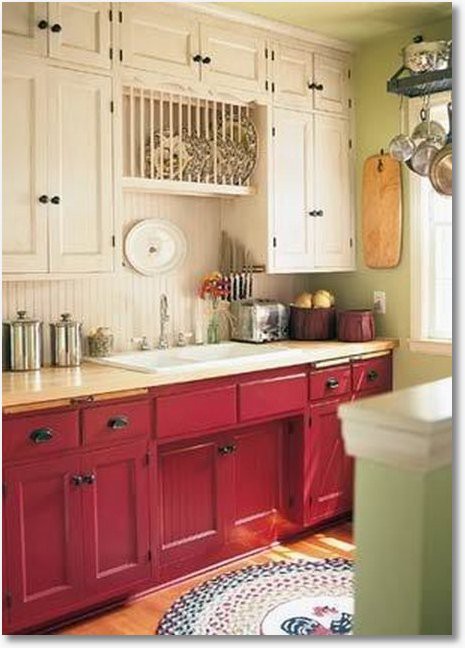
I love the look of the red cabinets on the bottom and the lighter color above. I felt that all red cabinets would look too heavy and make my already-small kitchen look smaller.
The red stain with the black glazing turned out beautiful. It reminds me of a very good glass of red wine.
The below picture was the inspiration for my color scheme. Although the colors in my new kitchen turned out much richer and deeper.

Below are pictures of the little extras I added that make the kitchen all the better.
 Jenn-Air slide-in downdraft convection range. I chose the downdraft because I didn't want a huge hood hanging over the stove. Jenn-Air was the only model available that had a downdraft AND I could afford.
 Pull-out spice cabinet. This thing is awesome!
 Rev-a-Shelf pots/pans organizer.
 Rev-a-Shelf half-moon lazy susan for the blind corner.
 Organization for cookie sheets, etc. Another great addition.
 I use this pull-out drawer as a small appliance "garage".
That's about it. I'd love to hear your comments. Regardless of what anyone says, I love the way the remodel turned out and look forward to many years enjoying my new kitchen,
Everyone who has ever done a remodel goes through the same thing. I kept reminding myself that this is only temporary and I would have the rest of my life to enjoy my new kitchen.
The remodel turned out GREAT! I still walk into my kitchen and do a double-take; I can't believe this is my kitchen. I want to share the pictures, because I am so happy with the way things turned out. I used to hate my cracker-box-of-a-kitchen, but now I feel as if I have the biggest kitchen ever.
I have before and after pictures, so you can see the whole story.

My kitchen sink with the missing doors. They were disgusting so I removed them and added the curtains.


The pantry - before.


Same area now with built-in cabinets and more counter space. My husband figured we added 26 square feet of counter space. To save counter space, we installed the microwave under the counter. I got this idea in the kitchen showroom area at Lowe's actually. The microwave is on a pull-out shelf so we can get behind it to clean.

I used Elfa Shelving to create more storage. It always looked like a mess.


Looking toward the stove from the dining room.

I love the look of the red cabinets on the bottom and the lighter color above. I felt that all red cabinets would look too heavy and make my already-small kitchen look smaller.
The red stain with the black glazing turned out beautiful. It reminds me of a very good glass of red wine.
The below picture was the inspiration for my color scheme. Although the colors in my new kitchen turned out much richer and deeper.
Below are pictures of the little extras I added that make the kitchen all the better.


That's about it. I'd love to hear your comments. Regardless of what anyone says, I love the way the remodel turned out and look forward to many years enjoying my new kitchen,
Monday, February 27, 2012
"FOR PLEAT'S SAKE" PLEATED TOTE
I found this pattern months ago while surfing the internet and fell in love with it. It's been on my Pinterest "to-do" list for quite some time. I FINALLY got around to making it!
You can find the free PDF pattern here: Pleated Tote

Here is my version:


I made my own handles out of fabric rather than buy pre-made ones, since I couldn't find anything I liked in the stores. I embellished the straps with little matching fabric flowers and buttons. You can't see it, but I lined the tote with black fabric to match the handles. I also added a snap closure because I like my bags to close at the top.
Once again, I bought the fabric at JoAnn's.
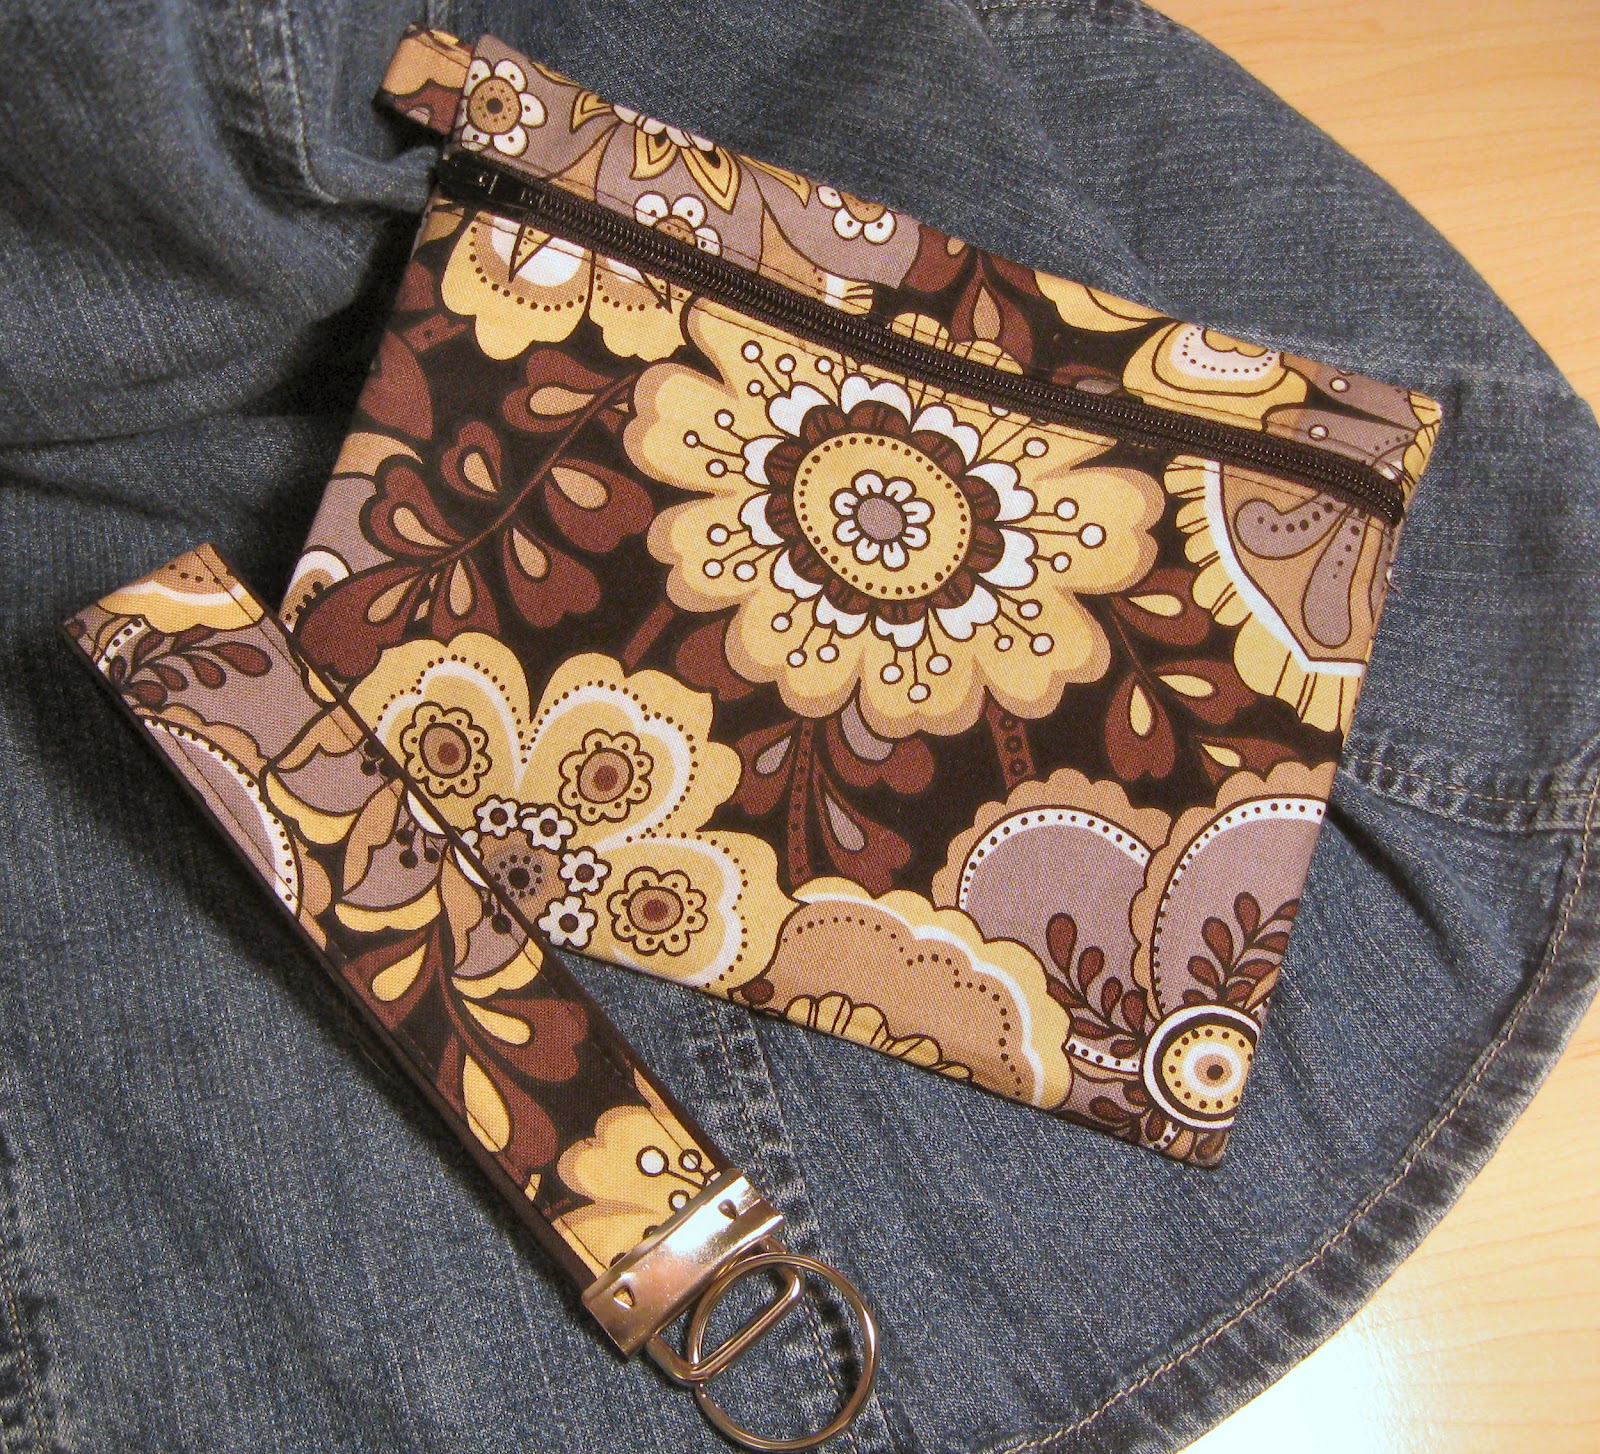
I was an easy pattern to follow and creates a good-sized tote. I had some extra fabric, so I made a small bag and key fob to go along with it.

You can find the free PDF pattern here: Pleated Tote

Here is my version:


Once again, I bought the fabric at JoAnn's.
I was an easy pattern to follow and creates a good-sized tote. I had some extra fabric, so I made a small bag and key fob to go along with it.
Happy Sewing!!
Saturday, February 25, 2012
FUSE AND GATHER TAPE
As I was perusing the internet and Pinterest, I came across a new product - new to me, anyway. It's called Fuse and Gather Tape.
This tape lets you press, pull, stitch, and you have gathers. All you do is press the Fuse 'n Gather on the wrong side of the fabric, tie threads at one end, pull the blue threads at the opposite end to gather to length needed. Perfect for creating easy gathers and ruffles for all types of crafts.


You can get a 5/8" 15-yd. package for $12.24 at Create for Less.com - just click on the CreateForLess link to the right under Sponsors.
I am definitely going to try this out. It looks like a great time-saver and Sew Simple!
Wednesday, February 22, 2012
SEWING AN INVISIBLE ZIPPER
I am in the process of making a pleated skirt that will need a zipper. I like using invisible zippers, but I haven't put one in since I made matching Star Trek costumes (pictured below) for my daughter and me about 18 years ago. I can't believe it's been that long!


It was a great refresher for me. I had forgotten how easy they are to sew. Now I just need to go purchase the invisible zipper foot that didn't come with my new sewing machine! (Which I absolutely love, btw.)
Tuesday, February 21, 2012
PELLON FABRIC STABILIZER GIVEAWAY
Check it out: Sew Can Do is sponsoring another give- away.
You can win nearly 50 yards of stabilizer from Pellon and that's a total value of over $90!

Just click here: Sew Can Do
Good Luck!!
You can win nearly 50 yards of stabilizer from Pellon and that's a total value of over $90!

Just click here: Sew Can Do
Good Luck!!
Monday, February 20, 2012
TIERED SKIRT


I purchased the fabric for this skirt at JoAnn's, my go-to place since it's the only fabric store in my area. I also go there because I get a teacher's discount. JoAnn's gives a 15% discount off your total purchase, sale and regular priced items. You just have to sign up for the card. You need to show proof you are a teacher; they require a school ID.
Happy Sewing!!
Sunday, February 19, 2012
EASY DROP-WAIST SKIRT


This is a super easy skirt to make. It can be done with as little as 1 1/2 yards of fabric - more if you want it longer.
Materials:
1 1/2 to 2 yards of fabric
1" elastic for waistband, same length as your wasitline, plus a 1/2" or so for seam allowance
Matching thread
*All seams are 1/2"
The skirt has two sections: the drop-waist (the top) and the skirt (the bottom).
To determine fabric for the drop-waist:
1.) For the length, measure from you waist to your hip crease. Your hip crease is the place where your femur (thigh bone) meets your hip joint - the part that bends when you sit.
For example: I measured 8" then added 2" for a total of 10" for the length of my drop-waist.
2.) For the width, measure your hips and add 5", plus another inch for seam allowance.
For example: The width for me was 42" plus 1" for seam allowance for a total of 43".
I was lucky enough that my fabric was wide enough from selvage to selvage, so I used the width of the fabric to cut one piece, 10" by 43".
You can divide this in two pieces, just be sure to add enough seam allowance.
To determine the length of the skirt:
3.) Decide how long you want the skirt and add 2" for seam allowance.
4.) For the width, take the width of the drop-waist and add 20" to that, plus 1" for seam allowance.
The width for my skirt was 62", plus 1" for a total of 63".
Put it all together:
5.) For the drop-waist, place the RIGHT sides of the fabric together matching the raw edges, and stitch the seam.
6.) To create the wasitband, fold the top edge of the drop-waist over 1 1/2 ".

Open that up, and fold over 1/4" to create a clean, finished edge.

Press seam back down and stitch closed, creating the casing for the elastic. Next, topstitch along the top edge of the wasitband. I think this adds a cleaner look and helps keep the elastic in the waistband from twisting.

The drop-waist section should look something like the picture below. To help line up the side seams of the skirt with the drop waist, center the fabric of the drop-waist and iron the sides to create creases. You will use this when joining the drop-waist to the skirt.

Now for the skirt:
7.) With the RIGHT sides together, line up the raw edges and stitch seam. Trim the seams with pinking shears to keep the edges from raveling. Then press open.

8.) Create the gathers on the skirt. If you don't know how to make gathers, here is a great tutorial: Gathers.
9.) Pin skirt to raw edge of the drop-waist with RIGHT sides together. Match seams of skirt to creases you ironed into the drop-wasit section, adjusting gathers so they are even. Stitch pieces together.
10.) Zig-Zag stitch along the gathered seam to keep fabric edges from raveling.

11.) Press allowance seam up and topstitch close to the edge of the seam where the drop-waist meets the gathered skirt.


12.) Add elastic to the waistband. First, open the seam in the waistband and, then pull the elastic through using a safety pin.


14.) Hem the skirt you favorite way and you're done!!
Sew Simple!!!
Subscribe to:
Posts (Atom)